Tipard PSP Video Converter for Mac 
Features list
 Convert videos to P PSP MPEG-4/H.264 and PS3 MPEG-4/H.264 video formats on Mac
Convert any video to WMA, WAV, M4A, AAC, AC3, OGG audio formats on Mac
Editing functions are powerful such as merging, trimming, adding text/picture to video etc.
With newly adopted technology, the conversion speed is 6X faster with perfect output quality
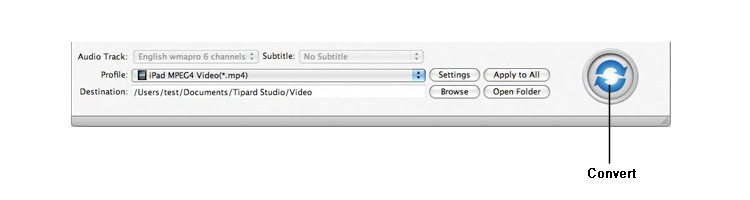
Select subtitle and audio track to your need and easy to use
PSP video converter for Mac enables you to convert any videos/movies to PSP/PS3 video formats on Mac you want. And this Mac PSP converter can also extract audio from video file and convert it to MP3, M4A, WAV, WMA audio formats. With this Mac PSP converter software, you are free to edit your favorite video as you like, you are allowed to crop play region of video, trim video length by setting its start and end time, merge several video files into one for output and add text/picture to video as watermark. As a whole, this is the best Mac video converter for PSP users.
Time-limited Offer with 30% Off
Step 1: How to add videos
After free download and install Mac PSP Video Converter, you can click "Add File" button to load different video files you need to convert. Another way, you can click "File">>"Add Video"/ "Add Folder" to add videos.
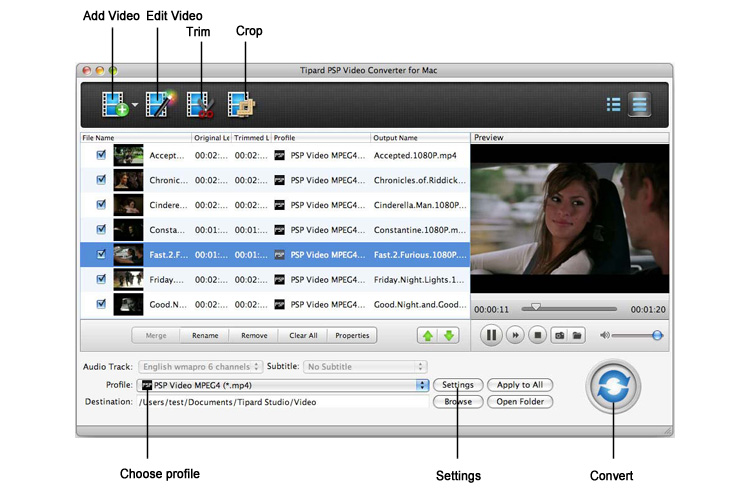
Step 2: How to edit videos
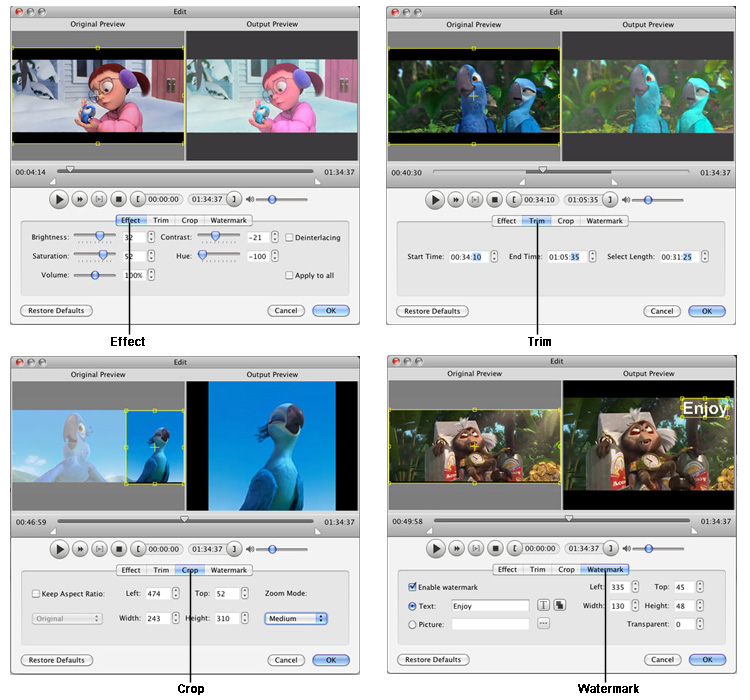
Two ways are easy for you to help edit the video: click "Clip">> "Trim"/"Crop"/"Effect"/"Watermark" or by the editing buttons. This step is optional and you can skip it if there is nothing to edit for you.
Trim- Make videos into clips and set the start time and end time as well as the video length.
Crop- Cut down the undesired or black edge or enlarge a certain part of video screen.
Effect - Adjust video Brightness, Saturation, Contrast and so on.
Watermark - To make personalized logo by adding text or picture.
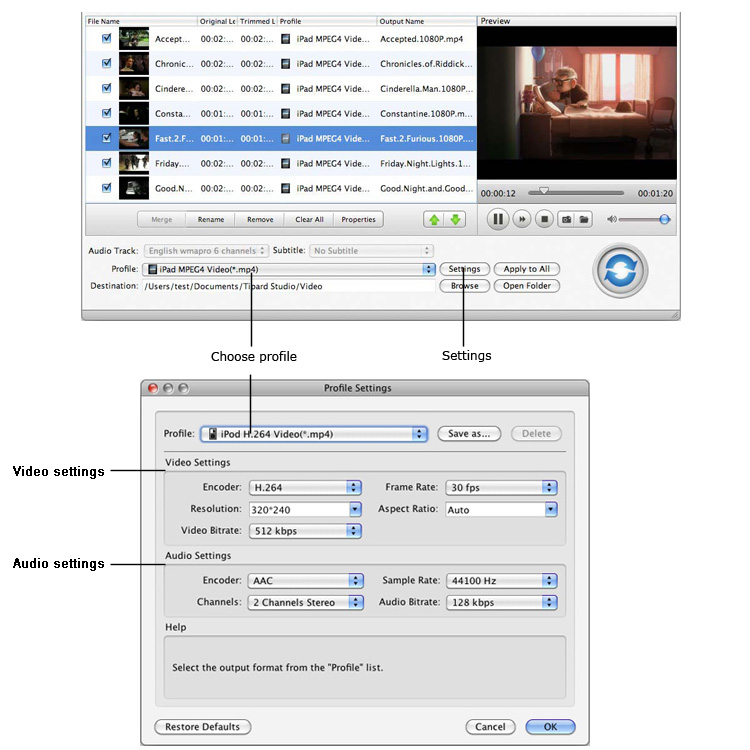
Step 3: How to choose format and settings
To meet the need of your playing, you can click the drop-down menu of "Profile" to choose the output format you really need. There are many built-in formats can be choosed for users, very easy and convenient.
Tips: "Apply to all" can be used when you convert more-than-one videos to the same format.
You can set video parameters like video/audio bitrate, sample rate, resolution and so on. Users can also set detailed parameters in "Settings" which can help users improve the video/audio quality.
Step 4: How to convert videos
Finishing all above settings, users can convert videos with ease by simply clicking the "Convert" button and click "Open Folder" after conversion. During conversion, users can view the conversion screen by tick it. Besides, if you convert bundles of long videos at one time or you need to shut down the video without oversee it during conversion, you can tick the shutdown after conversion. Open folder after conversion is another convenient way for users to get the video easily without finding.
Related Products
Hot Guides
Video Guide
coming soon....
 Home
Home Products
 Guides
 Support